


1、GitLab 社区版(CE)和企业版(EE)在功能和支持上存在显著差异,核心区别在于企业版提供了更多面向企业级应用的高级功能,特别是在安全、合规和项目管理方面 。
下面这个表格清晰地展示了两者的核心区别。
💡 核心差异详解
1. 安全与合规能力
企业版在安全方面提供了强大工具,包括动态应用程序安全测试(DAST)、静态应用程序安全测试(SAST)及依赖项扫描,能帮助团队在开发早期发现潜在漏洞 。其日志审计功能满足企业合规性要求 。
2. 项目管理与协作
企业版支持史诗级项目管理,可以跨项目组织工作,并提供价值流分析功能,帮助识别交付流程中的瓶颈 。高级审批规则和合并请求依赖管理使得大规模团队协作更加规范高效 。
3. 高性能与可扩展性
针对大规模用户场景,企业版进行了深度优化。基准测试表明,在企业版上QPS(每秒查询数)更高,延迟显著降低,能够更好地支持大型团队的并发使用 。
2、使用docker-compose部署环境
version: '3.7'
services:
  web:
    image: 'gitlab/gitlab-ee:latest'
    hostname: git.wshlyl.cn
    container_name: gitlab
    # restart: always
    environment:
      GITLAB_OMNIBUS_CONFIG: |
        external_url 'http://git.wshlyl.cn'  # 改为 HTTP

        # 启用并配置容器镜像仓库
        registry['enable'] = true
        registry_external_url 'http://git.wshlyl.cn'  # 改为 HTTP
        registry_nginx['enable'] = false
        registry['port'] = 5000

        letsencrypt['enable'] = false
        nginx['ssl_certificate'] = ""
        nginx['ssl_certificate_key'] = ""
        # GitLab 容器镜像仓库相关设置
        gitlab_rails['registry_enabled'] = true
        gitlab_rails['registry_host'] = "git.wshlyl.cn"
        gitlab_rails['registry_port'] = ""
        gitlab_rails['registry_api_url'] = "http://localhost:5000"
        gitlab_rails['registry_path'] = "/var/opt/gitlab/gitlab-rails/shared/registry"

        # 禁用内置的 PostgreSQL
        postgresql['enable'] = false

        # 配置外部 PostgreSQL 数据库
        gitlab_rails['db_adapter'] = 'postgresql'
        gitlab_rails['db_encoding'] = 'unicode'
        gitlab_rails['db_host'] = '192.168.1.3'
        gitlab_rails['db_port'] = 5433
        gitlab_rails['db_database'] = 'gitlab'
        gitlab_rails['db_username'] = 'root'
        gitlab_rails['db_password'] = '密码'

        # 禁用内置的 Redis
        redis['enable'] = false
        gitlab_rails['redis_host'] = '192.144.237.185'
        gitlab_rails['redis_port'] = 6379
        gitlab_rails['redis_password'] = '密码'
    ports:
      - '8418:80'
      - "4433:443"
      # 移除 443 端口映射
    volumes:
      - '/volume3/DataSource/gitlab/config:/etc/gitlab'
      - '/volume3/DataSource/gitlab/logs:/var/log/gitlab'
      - '/volume3/DataSource/gitlab/data:/var/opt/gitlab'
      - '/volume3/DataSource/gitlab/registry:/var/opt/gitlab/gitlab-rails/shared/registry'
      # 移除 SSL 证书目录挂载
等待拉取完成即可,端口可自行修改。
3、破解步骤
3.1、执行ruby容器拉取并进入容器
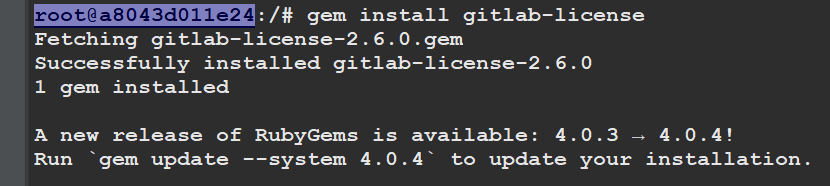
docker run -it --rm ruby /bin/bash3.2、执行安装许可证,回车后稍等一下,
gem install gitlab-license这句话执行完成效果
3.3、添加许可证,先执行许可证添加命令:
cat > license.rb回车后是个黑框,不要操作任何其他按钮,复制粘贴以下文本:
注意最后一行必须空出来,直接在end上结束后续会报错。
require "openssl"
require "gitlab/license"
key_pair = OpenSSL::PKey::RSA.generate(2048)
File.open("license_key", "w") { |f| f.write(key_pair.to_pem) }
public_key = key_pair.public_key
File.open("license_key.pub", "w") { |f| f.write(public_key.to_pem) }
private_key = OpenSSL::PKey::RSA.new File.read("license_key")
Gitlab::License.encryption_key = private_key
license = Gitlab::License.new
license.licensee = {
  "Name" => "Your Company",
  "Company" => "Your Company",
  "Email" => "example@test.com",
}
license.starts_at = Date.new(2023, 1, 1) # 开始时间
license.expires_at = Date.new(2099, 1, 1) # 结束时间
license.notify_admins_at = Date.new(2052, 12, 1)
license.notify_users_at = Date.new(2052, 12, 1)
license.block_changes_at = Date.new(2053, 1, 1)
license.restrictions = {
  active_user_count: 10000,
}
puts "License:"
puts license
data = license.export
puts "Exported license:"
puts data
File.open("GitLabBV.gitlab-license", "w") { |f| f.write(data) }
public_key = OpenSSL::PKey::RSA.new File.read("license_key.pub")
Gitlab::License.encryption_key = public_key
data = File.read("GitLabBV.gitlab-license")
$license = Gitlab::License.import(data)
puts "Imported license:"
puts $license
unless $license
  raise "The license is invalid."
end
if $license.restricted?(:active_user_count)
  active_user_count = 10000
  if active_user_count > $license.restrictions[:active_user_count]
    raise "The active user count exceeds the allowed amount!"
  end
end
if $license.notify_admins?
  puts "The license is due to expire on #{$license.expires_at}."
end
if $license.notify_users?
  puts "The license is due to expire on #{$license.expires_at}."
end
module Gitlab
  class GitAccess
    def check(cmd, changes = nil)
      if $license.block_changes?
        return build_status_object(false, "License expired")
      end
    end
  end
end
puts "This instance of GitLab Enterprise Edition is licensed to:"
$license.licensee.each do |key, value|
  puts "#{key}: #{value}"
end
if $license.expired?
  puts "The license expired on #{$license.expires_at}"
elsif $license.will_expire?
  puts "The license will expire on #{$license.expires_at}"
else
  puts "The license will never expire."
end
粘贴后执行Ctrl+C结束就行。不要回车。
3.4、查看许可证生成情况。
ruby license.rb输出以下信息即为成功。
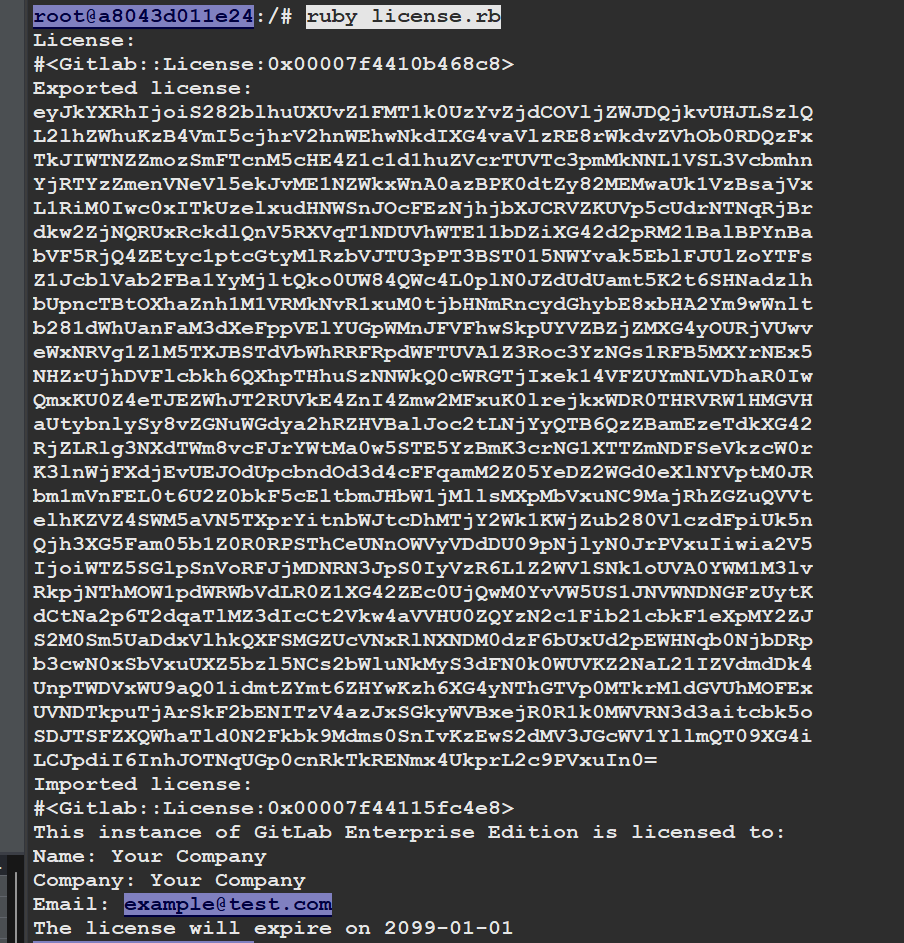
至此,上面的步骤会生成这三个文件生成 GitLabBV.gitlab-license license_key license_key.pub 这三个文件。
3.5、拷贝文件
上面执行的ssh窗口不能关闭,关闭了文件无法拷贝,在复制一个窗口,不进入容器,在外部将文件拷贝出来。效果如下:

执行拷贝的命令,就复制这两个就可以了:
命令解释:
cp 复制命令
a8043d011e24 这个是ruby的镜像id,不是gitlab的,可以通过
docker ps查看。/volume3/DataSource/gitlab 这个是当前主机的路径,就是需要把文件从容器中拷贝到这个文件夹
docker cp a8043d011e24:/license_key.pub /volume3/DataSource/gitlabdocker cp a8043d011e24:/GitLabBV.gitlab-license /volume3/DataSource/gitlab3.6、执行替换文件
命令解释:
cp 复制命令
/volume3/DataSource/gitlab/license_key.pub 这个是当前主机的路径,就是需要把文件从容器中拷贝到这个文件夹
e8f0bb74ddf2 这个是gitlab的镜像id,不是ruby的,可以通过
docker ps查看。/opt/gitlab/embedded/service/gitlab-rails/.license_encryption_key.pub 这个路径是gitlab容器内的路径,不用改。
docker cp /volume3/DataSource/gitlab/license_key.pub e8f0bb74ddf2:/opt/gitlab/embedded/service/gitlab-rails/.license_encryption_key.pub执行后的效果如下:有Successfully即为成功。

3.7、修改gitlab文件,升级到 ULTIMATE 版本。
在主机上执行命令进入gitlab容器内部:
docker exec -it gitlab bash执行修改命令:
vi /opt/gitlab/embedded/service/gitlab-rails/ee/app/models/license.rb一直往下翻找到:restricted_attr(:plan).presence || STARTER_PLAN 这句话,更改为ultimate版本。
替换对应 restricted_attr(:plan).presence || STARTER_PLAN 为 restricted_attr(:plan).presence || ULTIMATE_PLAN
大概位置在367行左右。
在退出就行。
3.8、导入License文件
登录 gitlab 后台,管理中心 -> 许可证 (/admin/license),导入 GitLabBV.gitlab-license
不是导入文件,上面把文件复制出来,用文本工具打开复制粘贴
可以选择 cat GitLabBV.gitlab-license 打印出文件内容后,把密钥复制后使用密钥文本,而不是上传文件。
最后的效果图:


默认评论
Halo系统提供的评论